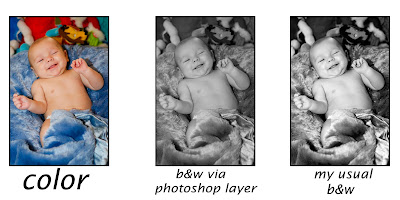
I love black and white pictures, you probably know this if you've seen much of my work. A lot of times if I don't like the lighting, or the color cast, or I didn't get the exposure right I'll zap it into black and white with the hopes of saving a picture. I'm not saying that's the only reason I use b&w, no way, I love to take a good picture and make it even better with a nice black and white conversion. I've made it a point of learning the best ways to convert color pictures to bold beautiful black and whites. There are plenty of good ways, but I would highly recommend staying away from the "desaturate" button. Even in the most advanced photoshop (CS3) the black and white conversion is flat. You need a couple of extra steps to make it really work.
For this example, I've started out with a nicely colored picture, decent expose, decent contrast. In the second frame I added the black and white adjustment layer - sure it's still a cute picture but the black and white is very dull. To make it pop in the final frame, I added contrast using a curves adjustment layer. I also adjusted the levels in another layer, boosting the blacks and brightening the whites. Now this sounds like a lot for 1 picture but with a few extra strokes you can save an action and have it to use every time you need it. I'll go into making actions another day :)
Any questions or comments?


1 comment:
I just learned a couple weeks ago how to do an action, and they save SO much time! lol I also just got CS3 in the mail yesterday as well as a larger RAM for my PC. I can't wait to get it all hooked up!! My next big purchase will be another lens or a macbook.
Post a Comment